• Skip to primary navigation
  • Skip to main content
  • Skip to primary sidebar

Quick & Healthy Meal Prep Recipes

  • Home
  • Healthy & Wholesome
  • Quick & Easy Meals
  • Sip & Stir Delights
  • Contact Page
  • Navigation Menu: Social Icons

    • Facebook
    • Instagram
    • Pinterest
    • RSS
    • Snapchat
    • Twitter

Quick & Easy Meals

The Best 5-Ingredient Sloppy Joes: A 20-Minute Dinner

The Weeknight Dinner That Saved My Sanity

I remember those hectic evenings like they were yesterday. Balancing work deadlines, school pickups, and the constant question, “What’s for dinner?” felt overwhelming. On nights like that, I didn’t need a gourmet dish—I needed a quick win. Something fast, tasty, and sure to please the family.

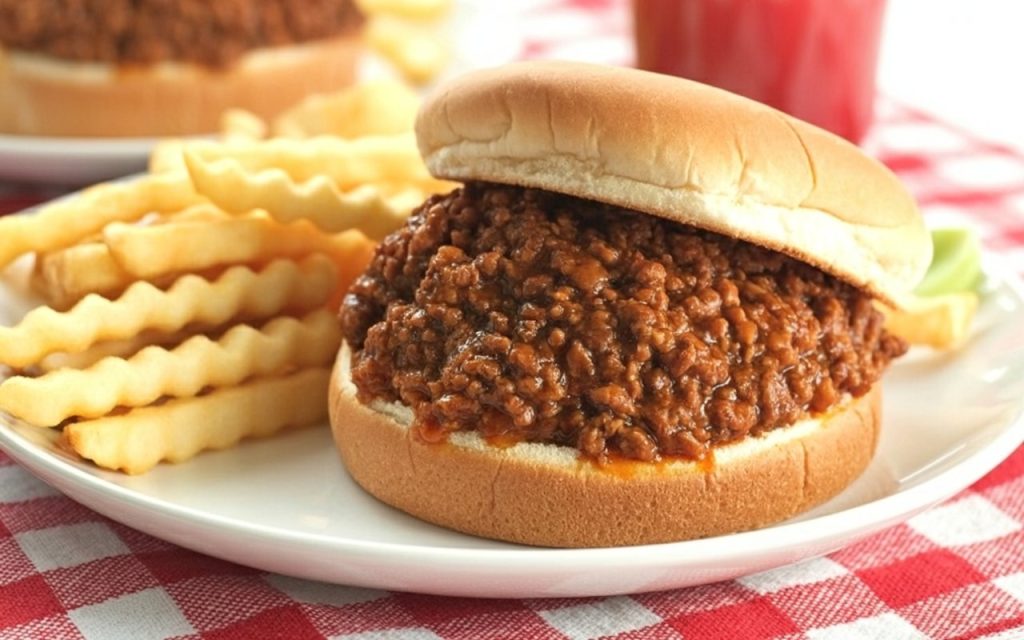
That’s when this Easy 5-Ingredient Sloppy Joes recipe became my lifesaver. More than just a quick fix, it’s a 20-minute miracle that turns a few pantry staples into a saucy, flavorful, and crowd-pleasing meal. Forget the canned version—this is homemade comfort made simple.

Your 5-Ingredient Arsenal for the Perfect Sloppy Joe

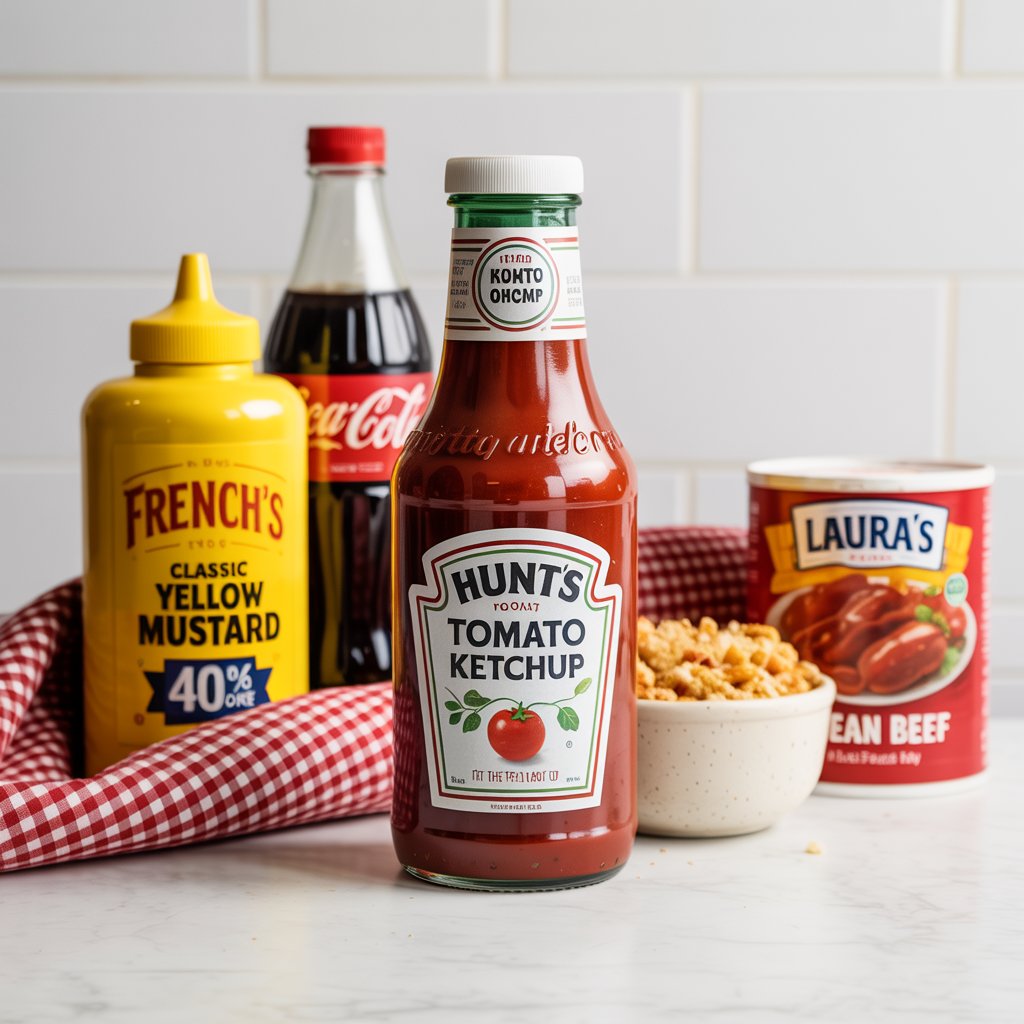
The beauty of this recipe lies in its simplicity. With just five main ingredients (plus buns and cheese, if you like), you create a savory, tangy, slightly sweet sauce that clings perfectly to juicy ground beef. It’s comfort food at its easiest and most satisfying.

ComponentIngredientAmount & Sensory Description
The Meaty BaseGround Beef1 lb – The star of the show. An 80/20 or 85/15 blend provides the best balance of flavor and juiciness.
The “Sloppy” SauceKetchup3/4 cup – The sweet and tangy foundation of our classic sauce.
Yellow Mustard1/4 cup – Adds a sharp, zesty kick that cuts through the richness.
Brown Sugar2 tbsp, packed – Lends a deep, molasses-like sweetness that creates that signature sloppy joe flavor.
Worcestershire Sauce2 tbsp – Our secret weapon for a complex, savory, umami depth of flavor.
For ServingHamburger Buns8 count package – Soft, pillowy buns are the perfect vehicle for our messy masterpiece.
Cheddar Cheese8 slices – Sharp, melty cheddar adds a creamy, savory finish.

Timing: Dinner on the Table Faster Than a Food Delivery

Easy 5-Ingredient Sloppy Joes

In the time it takes to decide on a takeout order, you can have this homemade dinner on the table. This is the definition of a quick weeknight win.

Preparation Time: 5 minutes
Cooking Time: 10 minutes
Total Time: 15 minutes

A recent survey on family cooking habits revealed that the average weeknight dinner takes 45–60 minutes to prepare. This Easy 5-Ingredient Sloppy Joes recipe is over 50% faster, making it a true game-changer for busy families.


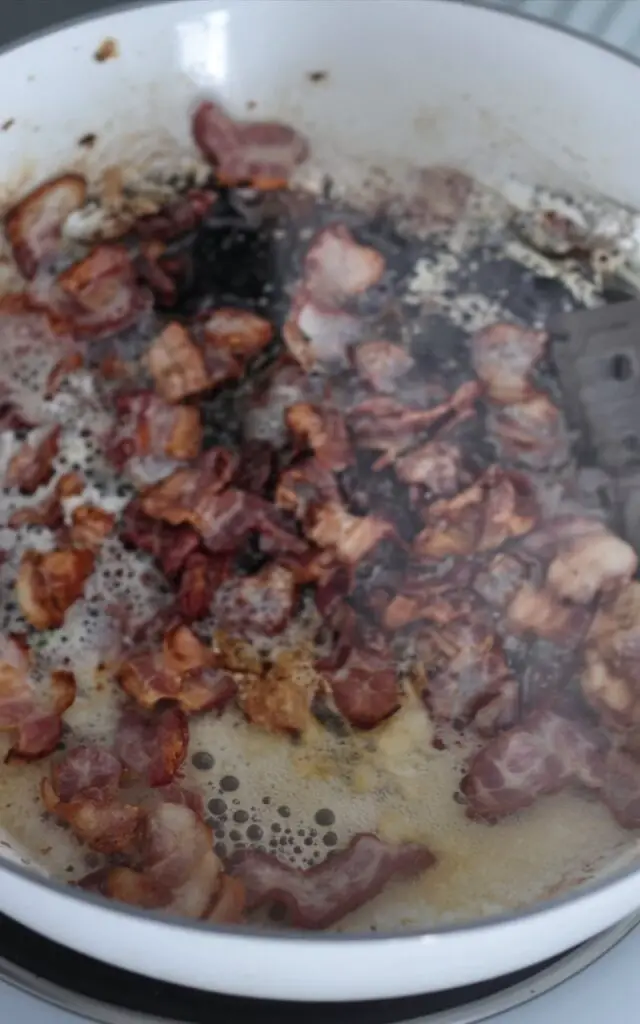
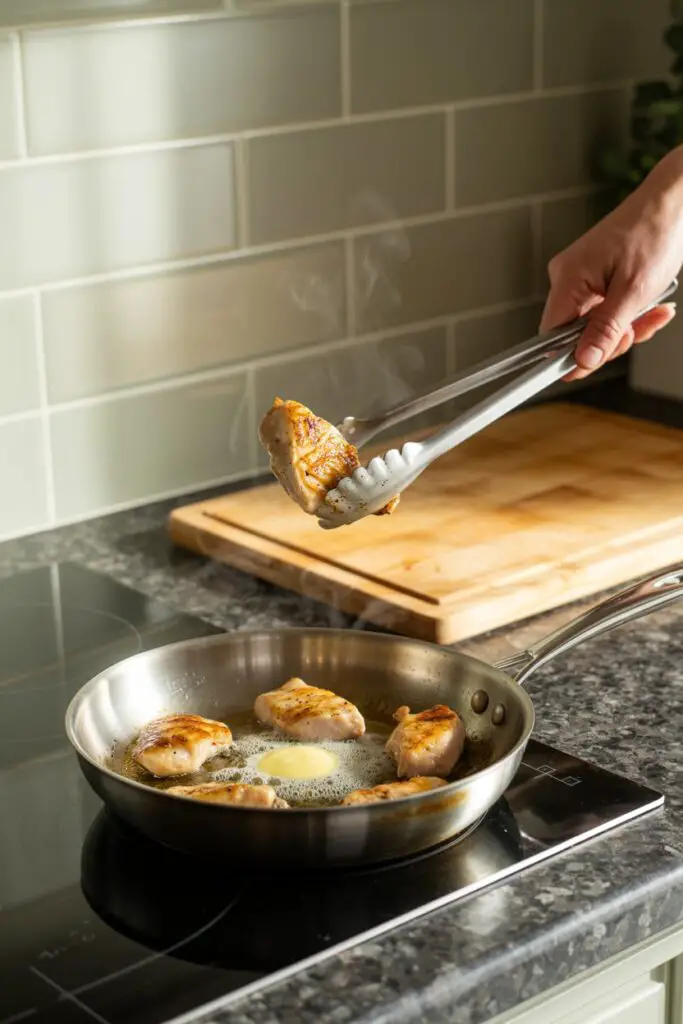
Step 1: Brown the Beef

Place a large skillet or Dutch oven over medium-high heat. Add the ground beef and break it apart with a wooden spoon or spatula.

Cook until the beef is browned all over and no longer pink, about 7–8 minutes. Drain off excess grease to prevent the sauce from becoming oily. You can tilt the pan and spoon it out, or transfer the beef to a colander before returning it to the skillet.


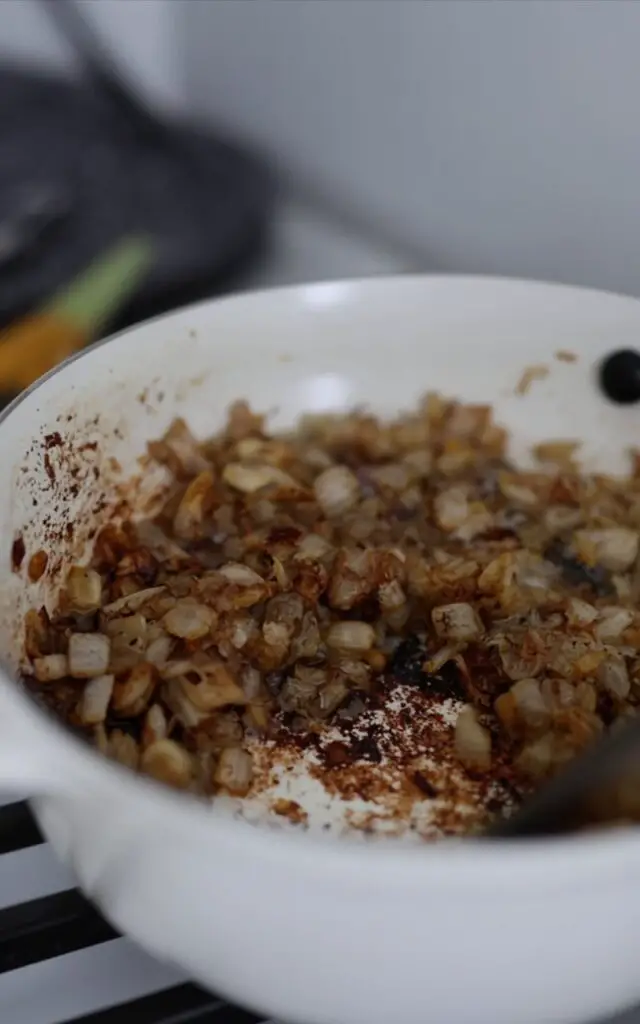
Step 2: Create the Signature Sauce

With the skillet still on medium heat, pour in the ketchup, yellow mustard, Worcestershire sauce, and packed brown sugar. Stir until the beef is evenly coated.

The mixture will immediately give off that unmistakable sloppy joe aroma.


Step 3: Simmer to Perfection

Bring the mixture to a gentle simmer. Reduce the heat to low, cover the skillet, and let it simmer for 5–7 minutes. This allows the flavors to meld and the sauce to thicken to that perfect “sloppy” consistency.

If you have a little extra time, simmering for 10–15 minutes will develop the flavor even further. Stir occasionally to prevent sticking.


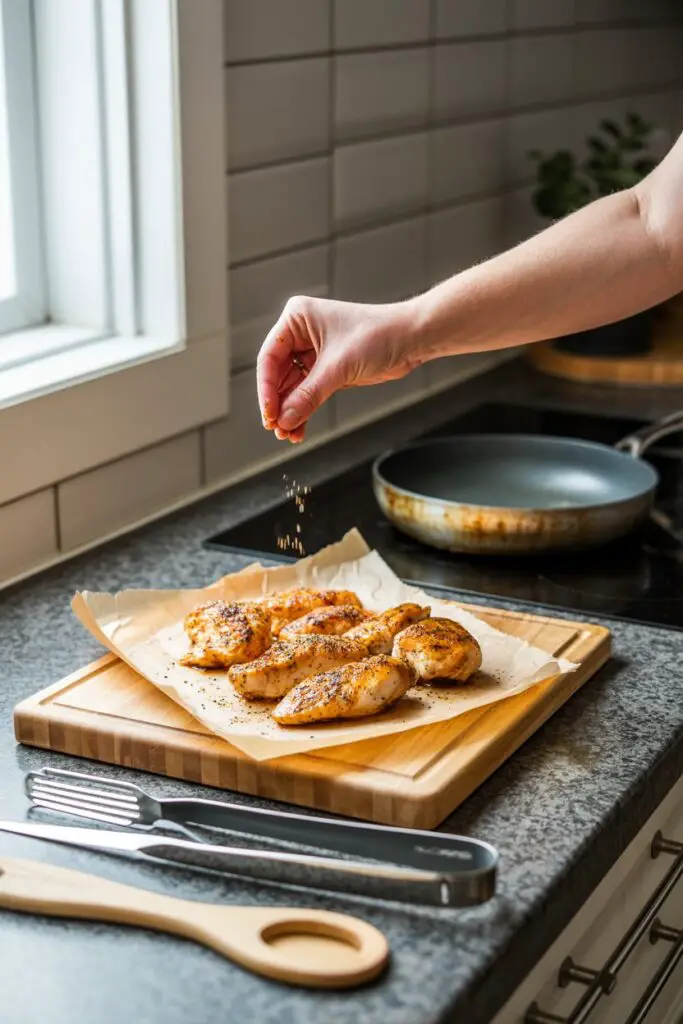
Step 4: Assemble Your Masterpiece

While the meat simmers, prepare the buns. Serve them soft, or toast them lightly for added texture.

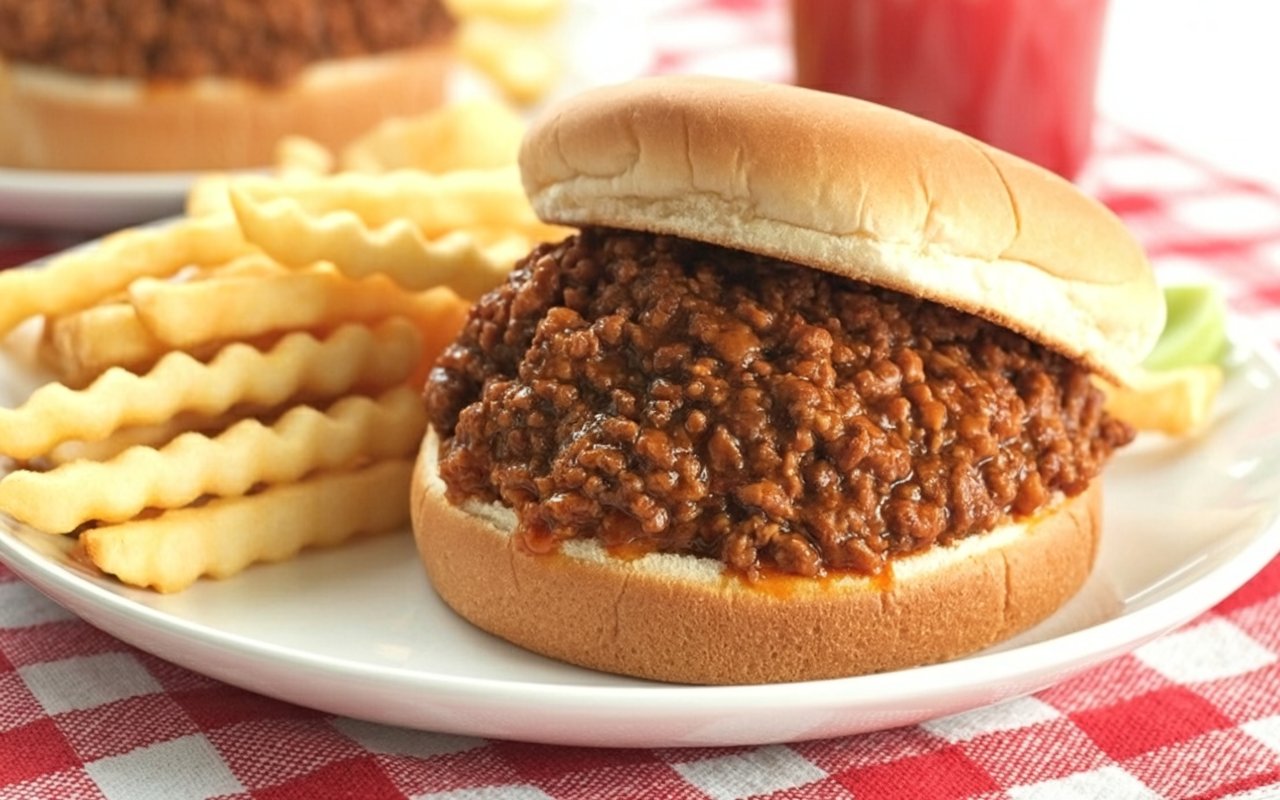
Spoon a generous amount of the sloppy joe mixture onto the bottom bun. Top with a slice of sharp cheddar cheese—the heat of the filling will melt it beautifully. Finish with the top bun and enjoy the delicious mess.


A Look at the Nutritional Side

This recipe is indulgent comfort food, but it’s helpful to know what’s in your meal. The following nutritional breakdown is an approximation for one sloppy joe (including bun and cheese), based on the recipe making 8 servings.

  • Calories: Approximately 450-500 kcal
  • Protein: 25g
  • Fat: 22g
  • Carbohydrates: 35g
  • Sugar: 15g
  • Sodium: 950mg

Healthier Alternatives for a Lighter Bite

Love the classic flavor but want a lighter twist? This recipe is flexible and easy to adapt.

Leaner Protein

Swap the ground beef for lean ground turkey or chicken to cut down on fat. Add a teaspoon of olive oil to the skillet before browning to prevent sticking.

Lower-Sugar Sauce

Choose no-sugar-added ketchup and reduce the brown sugar by half. Alternatively, replace it with a tablespoon of maple syrup or a sugar-free substitute.

Whole Grain Goodness

Serve the filling on whole wheat buns for added fiber and a more wholesome bite.

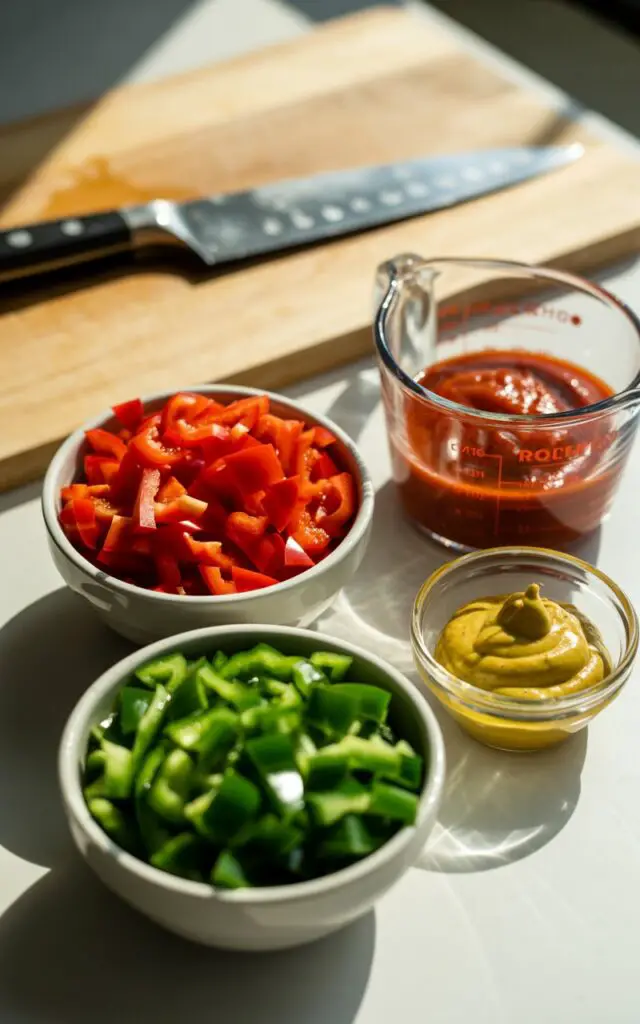
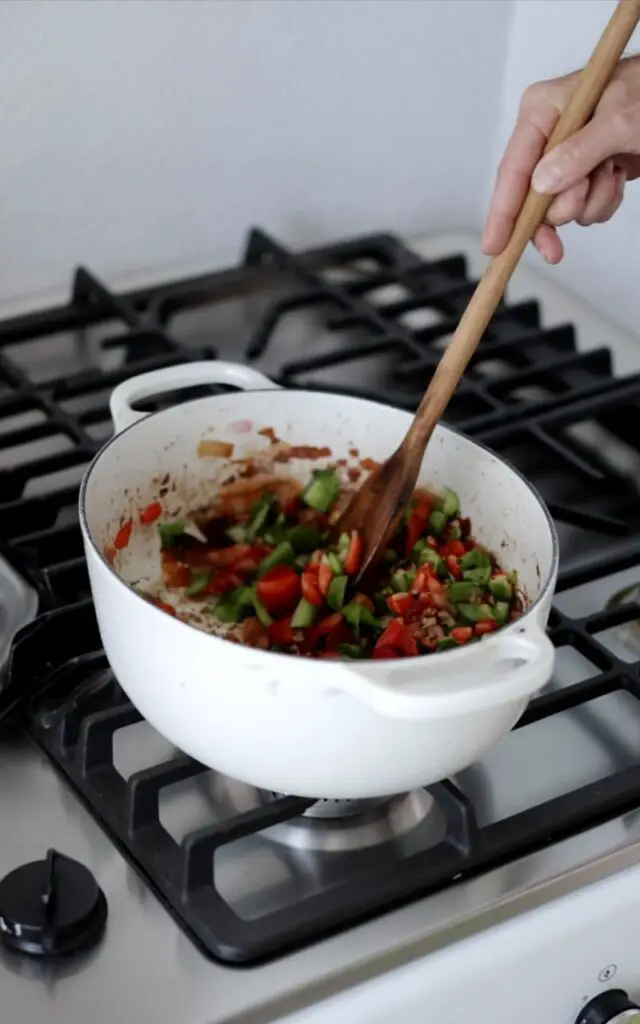
Sneak in Some Veggies

Finely chop a small onion and green bell pepper, then sauté them in the skillet before adding the meat. They’ll blend seamlessly into the sauce while boosting nutrients and flavor.

Common Mistakes to Avoid for Perfect Joes

This recipe is straightforward, but keeping these tips in mind will guarantee the best results every time.

Not Draining the Grease

Skipping this step leaves you with a greasy sauce that separates. Drain the fat after browning to keep the sauce rich and cohesive.

Skipping the Simmer

Simply mixing the ingredients won’t cut it. The simmering step is what thickens the sauce and develops that deep, tangy-sweet flavor.

Using Ultra-Lean Meat (Without Adjustments)

If you opt for very lean ground beef or turkey (like 95%), the mixture can end up too dry. Add a splash of beef broth or a spoonful of tomato paste to boost moisture and richness.

A Soggy Bottom Bun

Toast your buns before assembling. This small step creates a barrier that helps them stand up to the saucy filling.


Storing Tips for Easy Meals

For Leftovers

Refrigerate the sloppy joe mixture in an airtight container for up to 4 days. Bonus: the flavors often taste even better the next day.

Freezer-Friendly

The meat mixture freezes well. Cool it completely, then store in a freezer-safe container or bag for up to 3 months. Thaw overnight in the fridge and reheat on the stove or in the microwave before serving.

Easy 5-Ingredient Sloppy Joes

A quick and tasty classic—ground beef simmers in a sweet-tangy sauce of ketchup, mustard, brown sugar, and Worcestershire, then piled onto toasted buns with melty cheddar. Ready in just 20 minutes with only five pantry staples!
Print Recipe Pin Recipe
Prep Time 5 minutes mins
Cook Time 15 minutes mins
Total Time 20 minutes mins
Course: Main Course, Sandwiches
Cuisine: American, Quick & Easy
Calories: 420
Ingredients Equipment Method Notes

Ingredients
  

  • 1 lb ground beef 85–90% lean
  • 3/4 cup ketchup
  • 1/4 cup yellow mustard classic American style
  • 2 Tbsp brown sugar packed
  • 2 Tbsp Worcestershire sauce
  • 8 hamburger buns
  • 8 slices cheddar cheese low-moisture for melting

Equipment

  • Large Skillet For cooking the beef mixture
  • Knife & Cutting Board Optional, for buns
  • Wooden spoon or spatula For stirring
  • Measuring Cups & Spoons For precise amounts

Method
 

Brown the Beef:
  1. Heat a large skillet over medium-high heat. Add ground beef and cook, breaking up with a spoon, until no pink remains, about 5 minutes. Drain excess fat if necessary.
Make the Sauce:
  1. Stir in ketchup, mustard, brown sugar, and Worcestershire sauce.
  2. Bring mixture to a simmer, then reduce heat to medium-low and cook 5–7 minutes, stirring occasionally, until thickened.
Toast the Buns:
  1. Spoon a generous portion of the beef mixture onto each bottom bun. Top each with a slice of cheddar cheese, then the bun top.
Serve
  1. Serve hot with pickles or coleslaw on the side if desired.

Notes

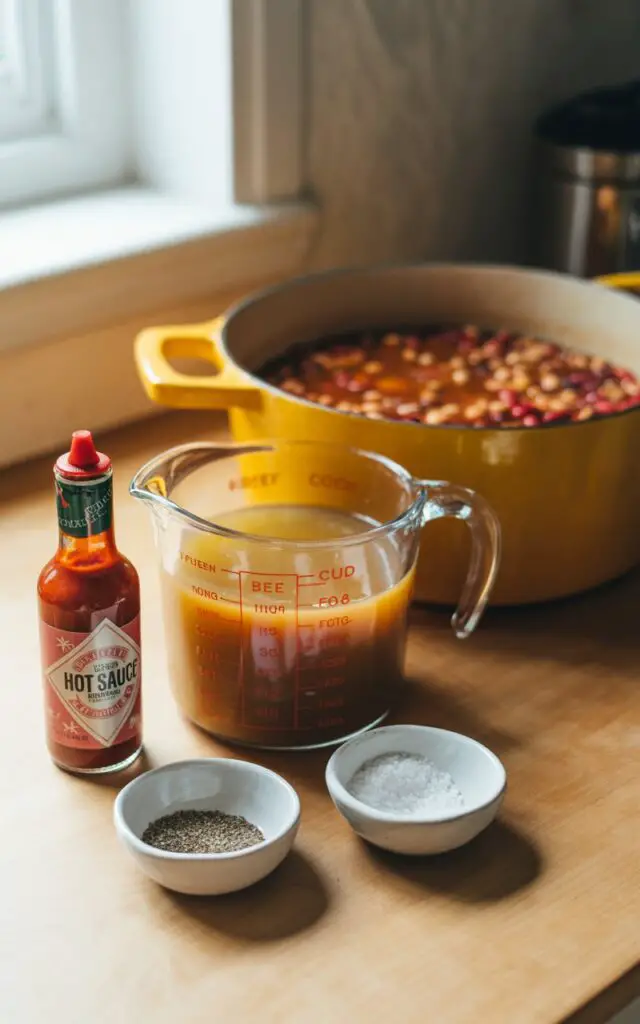
  1. For extra flavor, stir in ½ tsp smoked paprika or a dash of hot sauce.
  2. Swap ground turkey or chicken for a lighter version.
  3. Leftover meat mixture can be refrigerated up to 3 days and reheated for sandwiches or over rice.
  4. Add diced onions or bell peppers with the beef for more texture and veggies.

Best Homemade Baked Beans Recipe (From Scratch!)

The Ultimate Homemade Baked Beans

Few dishes are as universally comforting as a warm, hearty bowl of baked beans. They’re a staple at backyard barbecues, a favorite at potlucks, and the kind of cozy side that feels right at home on any table. For many of us, though, baked beans usually come from a can—quick, convenient, but often tinny-tasting and far too sweet.

Here’s the good news: the most flavorful, rich, and satisfying baked beans you’ll ever eat can be made right in your own kitchen, starting with ingredients you probably already have in your pantry. And the process? Far simpler (and more rewarding) than you might imagine.

Best Homemade Baked Beans Recipe (From Scratch!)

Simple, hearty staples slow-cooked into deeply savory, slightly sweet baked beans with smoky bacon and molasses. Minimal hands-on time for a classic crowd-pleaser.
Print Recipe Pin Recipe
Prep Time 15 minutes mins
Cook Time 5 hours hrs
Soaking Time 12 hours hrs
Total Time 5 hours hrs 15 minutes mins
Servings: 10
Course: Side Dish
Cuisine: American
Calories: 320
Ingredients Equipment Method Notes

Ingredients
  

  • 1 lb dried navy beans picked over and rinsed
  • 6 strips thick-cut bacon cut into thick slices
  • 2 medium yellow onions small diced, peeled
  • 3 cloves fresh garlic finely minced
  • 1/2 red bell pepper seeded and small diced
  • 1/2 green bell pepper seeded and small diced
  • 1 cup tomato puree
  • 3 Tbsp yellow mustard
  • 2 Tbsp tomato paste
  • 2 Tbsp apple cider vinegar
  • 1/3 cup molasses
  • 1/3 cup light brown sugar packed
  • A dash hot sauce
  • 3 cups beef stock low sodium, plus more as needed
  • Salt and freshly ground black pepper to taste

Equipment

  • Large bowl (for soaking)
  • Slotted spoon
  • Measuring Cups & Spoons
  • Colander
  • Dutch oven or heavy-bottomed pot (oven-safe)
  • Wooden Spoon
  • Oven, preheated to 325°F (165°C)

Method
 

  1. Soak the beans (overnight): Place rinsed navy beans in a large bowl and cover with cool water by at least 4 inches. Soak 8–12 hours. Drain and rinse.
  2. Render bacon & caramelize onions: In a Dutch oven over medium heat, cook bacon 6–8 minutes until crisp. Remove with a slotted spoon (reserve). Reduce heat to low; add onions and cook 30–40 minutes, stirring occasionally, until deeply caramelized.
  3. Sauté aromatics: Add minced garlic and diced red & green bell peppers. Cook 6–8 minutes over low-medium heat until peppers soften and garlic is fragrant.
  4. Combine sauce & beans: Stir in soaked beans, tomato puree, mustard, tomato paste, apple cider vinegar, molasses, brown sugar, a dash of hot sauce, and 3 cups beef stock. Mix in about 3/4 of the reserved bacon. Season with salt & pepper.
  5. Slow bake: Bring to a gentle simmer. Cover and transfer to a 325°F (165°C) oven for 3–3 1/2 hours, until beans are tender and sauce is thick. Check around 90 minutes; add 1/2–1 cup stock if liquid is low.
  6. Garnish & serve: Top with remaining crispy bacon (and chopped parsley or chives if desired). Serve hot.

Notes

Beans vary by age; total cook can range 4–6.5 hours. If beans are nearly tender but sauce is thin, uncover to reduce during the last 20–30 minutes. For sweeter beans, add +1 Tbsp molasses; for smokier depth, add a few drops liquid smoke.

This recipe takes humble dried navy beans and slowly simmers them in a deeply savory-sweet sauce made with crispy bacon, caramelized onions, molasses, and brown sugar. The result is a side dish with incredible depth and complexity—smoky, sweet, salty, and utterly satisfying. More than just a recipe, it’s a method that will forever change the way you think about baked beans.

Timing

The secret to incredible baked beans is a long, slow cook. While the total time is significant, the active, hands-on time is minimal, making this a perfect weekend project.

  • Soaking Time: 8-12 hours (overnight)
  • Active Prep Time: 15 minutes
  • Cook Time: 4 to 6.5 hours
  • Total Project Time: A full day, but almost entirely hands-off!

Step-by-Step Instructions

Follow these steps to build layers of deep, savory flavour for the best baked beans of your life.

Step 1: Soak the Beans Overnight

This is a crucial first step when cooking with dried beans. Place your rinsed navy beans in a large bowl or container and cover them with cool water by at least 4 inches. The beans will absorb a lot of water and expand as they soak.

Let them sit overnight, or for at least 8 hours. The next day, drain the soaking water, rinse the beans thoroughly, and set them aside.

Step 2: Render the Bacon and Caramelize the Onions

In a medium to large Dutch oven or heavy-bottomed pot, add the sliced bacon and cook over medium heat for 6–8 minutes, until it’s brown and crispy. Use a slotted spoon to remove the crispy bacon pieces (lardons) and set them aside on a plate, leaving the rendered bacon fat in the pot.

Add the diced onions to the pot, reduce the heat to low, and cook them slowly for 30–40 minutes, stirring occasionally. This gentle, slow process will deeply caramelize the onions, creating a rich, sweet, and savory foundation for your baked beans.

Step 3: Sauté the Aromatics

Once the onions are well caramelized and golden brown, stir in the minced garlic and diced bell peppers. Increase the heat slightly to low–medium and cook for 6–8 minutes, stirring occasionally, until the peppers have softened and the garlic is wonderfully fragrant.

Step 4: Combine the Sauce and Beans

Now it’s time to create that rich, flavorful sauce. Add the soaked and rinsed beans, tomato purée, yellow mustard, tomato paste, apple cider vinegar, molasses, brown sugar, a dash of hot sauce, and 3 cups of beef stock to the pot. Stir in about three-quarters of the crispy bacon pieces, reserving the rest for garnish. Season generously with salt and pepper, then mix well until everything is fully combined.

Step 5: The Long, Slow Bake

Bring the mixture to a gentle simmer on the stovetop. Cover the pot with a lid and carefully transfer it to your preheated oven at 325°F (165°C). Bake for 3 to 3 ½ hours, or until the beans are tender and the sauce has reduced into a rich, glossy consistency.

💡 Pro Tip: All dried beans cook a little differently. Start checking around the 90-minute mark. If the beans look dry, stir in an extra ½ to 1 cup of beef stock. The finished beans should be tender yet still hold their shape.

Step 6: Garnish and Serve

Your homemade baked beans are finally ready to enjoy! Serve them hot, topped with the reserved crispy bacon for extra crunch and flavour. For a fresh finish, add a sprinkle of chopped parsley or chives right before serving.

Nutritional Information

Here is an estimated nutritional breakdown per serving, assuming the recipe makes 10 servings.

  • Calories: 320 kcal
  • Protein: 14 g
  • Carbohydrates: 45 g (Fiber: 12 g)
  • Fat: 10 g (Saturated Fat: 3 g)

These beans are a fantastic source of plant-based protein and dietary fiber.

Healthier Alternatives

While this recipe is a classic, it’s easy to adjust it to suit different dietary preferences:

  • Lighter Version: Swap in turkey bacon to cut down on fat. You can also reduce the brown sugar and molasses by about 25% for a less sweet, more savory bean.
  • Vegetarian/Vegan Option: Skip the bacon and sauté the onions and peppers in 2 tablespoons of olive oil instead. Add ½ teaspoon of smoked paprika to mimic that smoky depth, and use vegetable stock in place of beef stock.

Serving Suggestions

These from-scratch baked beans are the undisputed champion of side dishes and belong at any gathering.

  • The Ultimate BBQ Side: Pair a big pot of these beans with grilled ribs, pulled pork sandwiches, brisket, burgers, or hot dogs.
  • Cozy Comfort Meal: Enjoy a warm bowl on its own with a thick slice of buttery cornbread for a simple, soul-satisfying dinner.
  • Classic English Breakfast: Add them to your plate with fried eggs, sausages, and toast for a hearty, traditional breakfast.

Common Mistakes to Avoid

  • Skipping the Soak: Forgetting to soak your beans will make them tough and dramatically increase cooking time.
    Solution: Always soak overnight, or use the “quick soak” method: boil beans in water for 2 minutes, turn off the heat, and let them sit (covered) for 1 hour.
  • Rushing the Onions: Caramelizing onions too quickly over high heat will burn them and add bitterness.
    Solution: Cook them low and slow for 30–40 minutes to build that sweet, savory flavor base.
  • Letting the Beans Dry Out in the Oven: Long baking can evaporate too much liquid, leaving beans dry.
    Solution: Check occasionally and add stock if the beans start to look exposed.

Storing and Reheating Tips

  • Storing: Keep leftovers in an airtight container in the fridge for up to 5 days.
  • Freezing: Baked beans freeze beautifully! Let them cool fully, then freeze in a container for up to 3 months. Thaw overnight in the fridge before reheating.
  • Reheating: Warm gently in a saucepan over low heat, stirring occasionally, until heated through.

Conclusion

Making baked beans from scratch is more than a recipe—it’s a return to authentic, deep flavors you’ll never find in a can. Sweet, smoky, savory, and perfectly tender, these beans are destined to become a family favorite for gatherings and weeknight meals alike.

We can’t wait for you to taste the difference homemade makes! Try this recipe at your next cookout and let us know what you think in the comments below. Don’t forget to rate the recipe and subscribe for more timeless comfort food ideas.


FAQs

Q1. Can I make these baked beans in a slow cooker?
Yes! After completing steps 1–4, transfer everything to your slow cooker. Cook on low for 6–8 hours or high for 3–4 hours until the beans are tender.

Q2. Can I use a different type of bean?
Absolutely. Navy beans are traditional, but Great Northern beans or pinto beans work just as well. Cooking times may vary slightly.

Q3. Why use beef stock instead of water?
Beef stock adds richness and depth that water simply can’t. It creates a sauce that’s hearty and flavorful. For a vegetarian version, swap in a high-quality vegetable stock.

Easy Buttery Seasoned Rice (Perfect Every Time!)

Buttery Seasoned Rice – The Side Dish That Steals the Show

Rice might be one of the most common sides in the world, but let’s be honest—it often ends up as the plain filler on the plate. What if that simple bowl of rice could be transformed into something buttery, fluffy, and bursting with flavor, all with hardly any extra effort?

Easy Buttery Seasoned Rice (Perfect Every Time!)

What You’ll Need: Ingredients. A pantry-friendly seasoned rice with chicken bouillon, warm spices, and a buttery finish. Fluffy, flavorful, and ready in under 30 minutes—no peeking while it cooks!
Print Recipe
Prep Time 2 minutes mins
Cook Time 13 minutes mins
Resting Time 10 minutes mins
Total Time 25 minutes mins
Servings: 6
Course: Rice, Side Dish
Cuisine: Global
Ingredients Equipment Method Notes

Ingredients
  

  • 2 cups long grain white rice uncooked
  • 3 1/4 cups water
  • 2 tsp chicken powder bouillon
  • 1 tsp garlic powder
  • 1 tsp onion powder
  • 1 tsp paprika
  • 1/2 tsp dried thyme
  • 2 Tbsp dried parsley optional
  • 1 tsp salt
  • 1/2 tsp freshly ground black pepper
  • 3 Tbsp unsalted butter

Equipment

  • Large saucepan with tight-fitting lid
  • Rubber spatula or fork
  • Measuring Cups & Spoons
  • Rice cooker (optional)

Method
 

  1. Combine in saucepan: In a large saucepan, add rice, water, chicken powder, garlic powder, onion powder, paprika, dried thyme, optional parsley, salt, and pepper. Stir to distribute seasonings evenly (but do not add butter yet).
  2. Simmer & cover: Bring to a lively simmer over medium-high heat. As soon as the surface ripples and edges bubble, cover with a tight-fitting lid and reduce heat to medium-low (low for powerful burners).
  3. Cook undisturbed: Cook for 13 minutes without lifting the lid—steam is essential for even cooking.
  4. Rest 10 minutes: Remove from heat and let stand 10 minutes, covered, to finish steaming and redistribute moisture.
  5. Fluff with butter: Uncover, add butter, and gently fluff with a spatula or fork until butter melts and coats the grains. Serve immediately.
  6. Rice cooker method: Add all ingredients except butter to the rice cooker, stir, and cook per manufacturer settings. Stir in butter at the end and fluff.

Notes

The 10-minute covered rest is non-negotiable for fluffy rice—don’t skip it. If your lid isn’t tight, place a sheet of foil under the lid to trap steam.

No need for complicated pilafs or time-consuming steps like sautéing and toasting. This Buttery Seasoned Rice recipe is the shortcut you’ve been waiting for: a one-pot wonder that’s just as easy as making regular rice, but infinitely more delicious. With a handful of pantry spices and a touch of butter, you’ll get perfectly cooked rice that’s savory, aromatic, and guaranteed to become the star of your dinner table.

Timing

This is the ultimate quick and easy side dish, ready in under 30 minutes from start to finish. The 10-minute resting period is crucial for perfect, fluffy grains!

  • Preparation Time: 2 minutes
  • Cook Time: 13 minutes
  • Resting Time: 10 minutes
  • Total Time: 25 minutes

Step-by-Step Instructions

Follow these simple, foolproof steps for perfectly fluffy, flavorful rice. The golden rule? Don’t lift the lid while it cooks!

Step 1: Combine Ingredients in a Saucepan
In a large saucepan with a tight-fitting lid, add all the ingredients except the butter—that means the uncooked rice, water, chicken powder, garlic powder, onion powder, paprika, dried thyme, parsley (if using), plus salt and pepper. Stir well to evenly distribute the seasonings.

Step 2: Bring to a Simmer and Cover
Place the saucepan over medium-high heat and bring the mixture to a simmer. You’ll know it’s ready when small bubbles appear around the edges and the surface begins to ripple. As soon as it reaches this stage, cover with the lid and reduce the heat to medium-low (or low, if your stove runs hot). The goal is a gentle, steady simmer.

Step 3: Cook Undisturbed
Set a timer for 13 minutes and resist the urge to peek. Keeping the lid closed allows the steam to cook the rice evenly.

Step 4: The Crucial 10-Minute Rest
After 13 minutes, remove the saucepan from the heat but leave the lid on. Let the rice rest undisturbed for 10 minutes—this final step redistributes the moisture and guarantees every grain comes out fluffy.

Step 5: Fluff with Butter and Serve
Once the resting time is up, remove the lid and add the butter. Use a fork to gently fluff the rice, mixing in the butter until it melts and coats the grains. Serve warm and enjoy your perfectly seasoned, buttery rice.

After the 10-minute rest, lift the lid to reveal beautifully aromatic, perfectly cooked rice. Add the 3 tablespoons of butter right on top, then use a fork or rubber spatula to gently fluff the rice, mixing in the butter as it melts and coats each grain. Serve immediately and enjoy!

Rice Cooker Method

Prefer using a rice cooker? This recipe works perfectly. Simply add all the ingredients—except the butter—into the rice cooker, stir to combine, and cook according to your manufacturer’s instructions. Once the rice is done, stir in the butter and fluff before serving.

Nutritional Information

Here is an estimated nutritional breakdown per serving, assuming the recipe makes 6 servings.

  • Calories: 285 kcal
  • Protein: 5 g
  • Carbohydrates: 50 g
  • Fat: 7 g (Saturated Fat: 4 g)

Healthier Alternatives

While this recipe is already delicious, here are a few easy swaps to suit different dietary needs:

  • Add Whole Grains: Make it with brown rice for extra fiber. Just adjust the water ratio and cooking time according to package directions, since brown rice needs more liquid and a longer cook.
  • Vegetarian/Vegan Option: Swap the chicken powder for a high-quality vegetable bouillon powder and use your favorite vegan butter.
  • Lower Sodium: Use a low-sodium chicken or vegetable bouillon to cut down on overall saltiness.

Serving Suggestions

This buttery seasoned rice is versatile enough to go with almost anything:

  • With Chicken, Fish, or Steak: The perfect sidekick to roasted chicken, pan-seared salmon, grilled steak, or pork chops.
  • As a Base for Bowls: Build burrito bowls, Mediterranean bowls with grilled veggies and feta, or Asian-inspired bowls with stir-fried vegetables and protein.
  • Alongside Stews and Curries: Ideal for soaking up rich, flavorful sauces from stews, chilis, or curries.

Common Mistakes to Avoid

Keep these tips in mind for consistently perfect, fluffy rice:

  • Lifting the Lid While Cooking: This releases steam and prevents the rice from cooking evenly.
    Solution: Trust the timer—don’t touch the lid until the 10-minute resting period is complete.
  • Skipping the Rest Time: The resting stage is essential for fluffy, separate grains.
    Solution: Move the pot off the heat, keep the lid on, and let it sit for 10 minutes.
  • Stirring the Rice While Cooking: This activates starches and makes the rice gummy.
    Solution: Stir once at the beginning to mix in the seasonings, then leave it alone until it’s time to fluff with butter.

Storing and Reheating Tips

Proper storage is key for both freshness and food safety:

  • Storing: Cool leftover rice quickly and store in an airtight container in the refrigerator for up to 3 days. Avoid leaving cooked rice at room temperature for too long.
  • Reheating: Place rice in a microwave-safe bowl, sprinkle with 1 tablespoon of water, cover with a damp paper towel, and microwave until heated through. The steam will restore its soft, fluffy texture.

Conclusion

Say goodbye to bland, boring rice forever! This Easy Buttery Seasoned Rice is a total game-changer for weeknight meals—simple, foolproof, and made with pantry staples. The result is perfectly fluffy, buttery, and flavorful rice that pairs with just about anything. Consider it a foundational recipe that will elevate countless future dinners.

We’d love to hear how this becomes your new favorite side dish! Try it with your next meal, then leave a comment, rate the recipe, and subscribe for more easy, from-scratch cooking inspiration.

FAQs

Q1. Can I use a different type of rice?
Yes! This recipe is designed for long-grain white rice, but basmati and jasmine rice also work well with similar cooking times. Short-grain, arborio, or brown rice require different water ratios and longer cooking times.

Q2. What can I use instead of chicken powder?
Vegetable bouillon powder makes this recipe vegetarian-friendly. You can also swap the water and bouillon entirely for 3 ¼ cups of good-quality chicken or vegetable broth, adjusting salt as needed.

Q3. Can I add fresh herbs?
Absolutely! While dried parsley keeps things easy, you can stir in freshly chopped parsley, cilantro, or chives when fluffing the rice with butter for a burst of fresh flavor.

Easy Homemade Crackers Recipe (Crispy & Rustic!)

Have you ever found yourself staring at the endless rows of cracker boxes in the snack aisle, feeling a little overwhelmed—and maybe even wishing for a simpler, more wholesome option? Crackers often seem like one of those foods that only exist in neatly packaged store-bought form, something too complicated to attempt at home. But here’s the secret: you can make the crispiest, most flavorful rustic crackers you’ve ever tasted with just a handful of pantry staples and less than 15 minutes of hands-on time.

This recipe takes away the mystery and proves just how easy—and rewarding—it is to bake your own. Everything comes together in one bowl, no fancy tools required, and the best part is that they’re endlessly customizable. Add seeds, herbs, or spices to make them your own, and before long you’ll be wondering why you ever settled for store-bought. Once you try these crackers, you may never go back to the box again.

Easy Homemade Crackers Recipe (Crispy & Rustic!)

Print Recipe
Prep Time 10 minutes mins
Cook Time 20 minutes mins
Cooling Time 10 minutes mins
Total Time 40 minutes mins
Servings: 6
Course: Appetizers, Snacks
Cuisine: American
Calories: 230
Ingredients Equipment Notes

Ingredients
  

  • 1 cup all-purpose flour(130 g)
  • 1 tsp granulated sugar(4 g)
  • 1/4 tsp freshly ground black pepper
  • 3 Tbsp olive oil(45 ml)
  • 1/2 cup whole wheat flour (70 g) see note for swaps
  • 1 tsp kosher salt(4 g)
  • 1/2 cup of water(125 ml)
  • flaky sea salt for sprinkling For the Toppings
  • seeds, chopped nuts, and/or chopped herbs as desired

Equipment

  • Large Mixing Bowl
  • Rolling Pin
  • Large baking sheet
  • Measuring Cups & Spoons
  • Spatula or Wooden Spoon
  • Parchment Paper
  • Knife or pizza cutter
  • Wire rack

Notes

Substitute whole wheat flour with other whole grains (spelt or rye) or use additional all-purpose flour. For ultra-crisp crackers, roll very thin and bake to a deep golden brown.

(Note: The whole wheat flour can be substituted with other whole grain flours like spelt or rye, or simply more all-purpose flour.)

Timing

This is a wonderfully quick and satisfying baking project, perfect for when you need a delicious snack in a hurry.

  • Preparation Time: 10 minutes
  • Cook Time: 15-20 minutes
  • Cooling Time: 10 minutes
  • Total Time: Approximately 40 minutes

Step-by-Step Instructions

Follow these simple steps to create a large, rustic sheet of perfectly crisp and flavourful crackers.

Step 1: Preheat Your Oven and Mix the Dough

Preheat your oven to 400°F (200°C). In a large mixing bowl, combine the all-purpose flour, whole wheat flour, sugar, kosher salt, and black pepper. Make a well in the center, then pour in the water and olive oil. Stir with a spatula or wooden spoon until the mixture comes together into a shaggy, cohesive dough.

Step 2: Roll Out the Cracker Dough

Transfer the dough onto your countertop and knead lightly for about 30 seconds, just until smooth. Place the dough ball on a sheet of parchment paper and roll it out with a rolling pin as thin and even as possible, aiming for about ⅛ inch thickness. Don’t worry about perfect edges—those rustic shapes give the crackers their charm! Slide the parchment with the rolled dough onto a large baking sheet.

Step 3: Add Your Favorite Toppings

Lightly dampen your hands with water and rub the top of the dough to help toppings stick. Sprinkle generously with flaky sea salt, then add any seeds, nuts, or herbs you love. Press them gently into the surface. For more uniform crackers, lightly score the dough with a knife or pizza cutter before baking.

Step 4: Bake Until Golden and Crisp

Place the baking sheet in the oven and bake for 15–20 minutes, until the dough is deeply golden brown and crisp. The exact timing will depend on how thinly you rolled it, so keep a close eye during the final minutes of baking.

Step 5: Cool and Break Into Pieces

Remove from the oven and let the cracker sheet cool completely on the baking sheet or a wire rack. Once cooled, break into rustic, snack-sized pieces and enjoy!

Nutritional Information

Here is an estimated nutritional breakdown per serving, assuming the recipe is divided into 6 servings.

  • Calories: 230 kcal
  • Protein: 5 g
  • Carbohydrates: 30 g
  • Fat: 10 g (Saturated Fat: 1.5 g)

These crackers are a wholesome snack, especially when made with whole grain flours and nutrient-dense seeds.

Healthier Alternatives

This recipe is already wholesome, but you can easily take it up a notch with these customizations:

  • Go 100% Whole Grain: Swap the flour blend for 1 ½ cups of whole wheat flour to make a heartier, more nutritious cracker.
  • Gluten-Free Crackers: Use a high-quality 1:1 gluten-free baking blend (with xanthan gum included) in place of the flours.
  • Nutrient-Dense Toppings: Sprinkle on flax seeds, chia seeds, pumpkin seeds, or sunflower seeds for a boost of healthy fats, fiber, and protein.

Serving Suggestions

These homemade crackers are incredibly versatile and make the perfect companion for your favorite dips, cheeses, and spreads.

Serving Suggestions

  • For a Cheese Board: These rustic crackers are a showstopper on any cheese or charcuterie board. Their sturdy texture pairs beautifully with both soft and hard cheeses, as well as jams and cured meats.
  • With Dips: Serve them alongside creamy hummus, fresh guacamole, savory tapenade, or your favorite cheese dip.
  • With Soup or Salad: Break them into smaller pieces and use as crunchy “croutons” for salads, or pair with a warm bowl of tomato soup for dipping.

Common Mistakes to Avoid

Follow these simple tips to make sure your crackers come out perfectly crisp every time:

  • Rolling the Dough Too Thickly: Thick dough won’t bake evenly and may stay soft in the center.
    Solution: Roll the dough as thinly and evenly as possible, about ⅛ inch thick.
  • Toppings That Won’t Stick: Sprinkling seeds or salt directly on dry dough will cause them to fall off after baking.
    Solution: Lightly dampen the dough with wet hands before adding toppings so they adhere properly.
  • Underbaking the Crackers: Pale, underbaked crackers lack both crunch and flavor.
    Solution: Bake until they’re a deep golden brown all over—the color brings out the toasty, nutty flavor.

Storing and Make-Ahead Tips

  • Storing: Once cooled completely, store the crackers in an airtight container at room temperature for up to 1 week. Avoid refrigerating, as it can make them lose their crispness.
  • Make-Ahead: The dough can be prepared up to 2 days in advance, wrapped tightly in plastic wrap, and stored in the fridge until ready to roll and bake.

Conclusion

Making crackers from scratch is one of those small kitchen projects that feels incredibly rewarding. With just a few pantry staples and a bit of time, you’ll create a snack that’s fresher, tastier, and more satisfying than anything you can buy at the store. This Easy Homemade Crackers recipe is the perfect starting point—simple, versatile, and endlessly customizable for all your snacking adventures.

We can’t wait for you to try it! Let us know your favorite topping combinations in the comments below, and don’t forget to rate the recipe and subscribe for more easy, from-scratch ideas.

FAQs

Q1. What are some good topping ideas for these crackers?
Try “Everything Bagel” seasoning, dried rosemary with flaky sea salt, a sesame–poppy seed mix, or even Parmesan cheese with garlic powder.

Q2. Can I make these crackers gluten-free?
Yes! Substitute the all-purpose and whole wheat flours with a high-quality 1:1 gluten-free baking blend that contains xanthan gum.

Q3. Why are my crackers not crispy?
The two most common reasons are dough that’s too thick or underbaking. Roll the dough to about ⅛ inch thickness and bake until deep golden brown for the best crunch.

Creamy Garlic Parmesan Chicken Pasta (30-Minute Recipe!)

After a long day, what’s the one dish that feels both comforting and just a little indulgent? For many of us, it’s a generous bowl of creamy, flavorful pasta. But too often, these dishes get reserved for weekends or restaurant outings, because we assume they’re too time-consuming for a weeknight.

Here’s the good news: you can bring that five-star pasta experience to your table in just 30 minutes.

This Creamy Garlic Parmesan Chicken Pasta is the ultimate one-pan recipe—simple, satisfying, and downright comforting. Imagine tender, golden-brown chicken paired with perfectly cooked pasta, all coated in a rich, velvety garlic Parmesan sauce. With just a few easy steps, you’ll have a dish that feels luxurious but comes together effortlessly, making it your new go-to for busy nights.

Creamy Garlic Parmesan Chicken Pasta

Print Recipe
Prep Time 10 minutes mins
Course: Main Course, Pasta
Cuisine: American, Italian
Calories: 750
Ingredients Equipment Method Notes

Ingredients
  

  • 2 large boneless, skinless chicken breasts cut into 1-inch cubes
  • 3 Tbsp unsalted butter
  • 1 1/2 cups heavy cream for a velvety sauce
  • 1 cup freshly grated Parmesan cheese
  • 1/4 tsp red pepper flakes optional, for a little kick
  • 2 Tbsp fresh parsley, chopped for garnish
  • 1 lb twisted pasta (fusilli) or penne/rotini
  • 4–5 cloves fresh garlic, minced
  • 1/2 cup chicken broth for deglazing & thinning
  • 1 tsp Italian seasoning divided use (half for chicken)
  • salt and black pepper to taste

Equipment

  • Large pot for pasta
  • Large Skillet
  • Tongs
  • Cutting board & chef’s knife
  • Colander
  • Wooden Spoon
  • Measuring Cups & Spoons
  • Microplane or grater

Method
 

  1. Cook pasta & sear chicken: Boil pasta in generously salted water until al dente; reserve 1/2 cup pasta water and drain. Meanwhile, pat chicken dry and season with salt, pepper, and half the Italian seasoning. Melt 1 Tbsp butter in a large skillet over medium‑high; sear chicken 3–4 minutes per side until golden and cooked through. Remove to a plate.
  2. Make garlic‑Parmesan sauce: Reduce heat to medium and melt remaining 2 Tbsp butter. Add minced garlic and optional red pepper flakes; cook 30–60 seconds until fragrant. Deglaze with chicken broth, scraping up browned bits. Stir in heavy cream and remaining Italian seasoning; simmer 2–3 minutes to thicken slightly. Reduce heat to low and gradually whisk in Parmesan until smooth.
  3. Toss & serve: Return chicken (and juices) to the skillet along with drained pasta. Toss gently to coat. Add splashes of reserved pasta water if needed for a silky, clinging sauce. Taste and adjust salt/pepper. Garnish with chopped parsley and serve immediately.

Notes

Pro tip: Freshly grated Parmesan melts smoother than pre‑shredded. For extra flavor, add a squeeze of lemon at the end, or sub 1/4 cup of the cream with dry white wine (simmer 1 minute after deglazing).

This recipe relies on simple, high-impact ingredients to create a restaurant-quality sauce in minutes. The secret to the silkiest, most decadent texture? Freshly grated Parmesan cheese—it melts more smoothly than pre-shredded varieties, giving the sauce its signature richness.

Timing

This entire decadent meal comes together in about the same time it takes to boil the pasta, making it the perfect go-to for a busy evening.

  • Preparation Time: 10 minutes
  • Cook Time: 20 minutes
  • Total Time: 30 minutes

Step-by-Step Guide to Your Garlic Parmesan Chicken Pasta

This process is broken down into a few simple phases, building flavour in the same pan for a delicious result and easy cleanup.

Step 1: Cook the Pasta and Sear the Chicken

The key to a quick meal is multitasking! Let’s get the pasta and chicken going.

Bring a large pot of generously salted water to a rolling boil, add the pasta, and cook until al dente according to the package directions. Before draining, be sure to reserve about ½ cup of the starchy cooking water, which will help bind and enrich the sauce later. While the pasta is cooking, pat the chicken cubes dry with a paper towel, then season them well with salt, pepper, and half of the Italian seasoning. In a large skillet, melt one tablespoon of butter over medium-high heat. When the butter is hot and shimmering, add the chicken in a single layer and sear for 3–4 minutes on each side, until golden brown and fully cooked through. Transfer the chicken to a plate and set aside.

Step 2: Create the Luscious Garlic Parmesan Sauce

Using the same skillet, lower the heat to medium and melt the remaining two tablespoons of butter. Add the minced garlic along with a pinch of red pepper flakes if you’d like some heat, and sauté for about 30–60 seconds, stirring constantly until the garlic is wonderfully fragrant—just be careful not to let it burn. Next, pour in the chicken broth to deglaze the pan, scraping up the browned bits from the bottom with a wooden spoon for maximum flavor. Stir in the heavy cream and the rest of the Italian seasoning, then let the mixture come to a gentle simmer for 2–3 minutes so it can thicken slightly. Reduce the heat to low and slowly sprinkle in the freshly grated Parmesan, stirring until it melts completely into the sauce, creating a luxuriously smooth and velvety texture.

Step 3: Combine Everything for the Grand Finale

Now that all the components are ready, it’s time to bring them together. Return the seared chicken—along with any flavorful juices that collected on the plate—back into the skillet with the cream sauce, then add the drained pasta. Using tongs, gently toss everything until the pasta and chicken are evenly coated in the rich garlic Parmesan sauce. If the sauce feels a little too thick, simply loosen it with a splash of the reserved pasta water until it reaches the perfect silky consistency. The starch in the water helps the sauce cling beautifully to every strand of pasta. Finish by tasting and adjusting with a pinch more salt and pepper if needed, then serve right away with a generous sprinkle of fresh parsley on top.

Creamy Garlic Parmesan Chicken Pasta

Print Recipe
Calories: 750
Notes

Notes

Nutritional Information

This is a rich and indulgent pasta dish, perfect for a satisfying meal. Here is an estimated nutritional breakdown per serving, assuming the recipe makes 6 servings.
  • Calories: ~750 kcal
  • Protein: 40 g
  • Carbohydrates: 60 g
  • Fat: 40 g (Saturated Fat: 22 g)

Healthier Alternatives

While this dish is a fantastic treat, here are a few simple swaps to make it a bit lighter:

  • Lighter Cream Sauce: You can substitute the heavy cream with half-and-half or evaporated milk for a sauce with less fat. The final result will be slightly less rich but still delicious.
  • Add Vegetables: Boost the nutritional value by adding some vegetables. Try wilting a few large handfuls of fresh spinach into the sauce at the end, or stirring in some steamed broccoli florets or sun-dried tomatoes.
  • Whole Wheat Pasta: For a boost of fiber, you can use your favorite whole wheat pasta variety.

Serving Suggestions

This creamy garlic parmesan chicken pasta is a hearty and complete meal all on its own, but it pairs wonderfully with a few simple sides.

  • With a Fresh Salad: A simple green salad with a bright, zesty lemon or balsamic vinaigrette is the perfect counterpoint to the rich, creamy pasta sauce.
  • With Garlic Bread: A slice of warm, crusty garlic bread is non-negotiable for some! It’s perfect for sopping up every last bit of that delicious Parmesan cream sauce.
  • With a Steamed Vegetable: A side of simple steamed asparagus or roasted broccoli adds a nice touch of color and freshness to the plate.

Common Mistakes to Avoid

Follow these simple tips to ensure your creamy chicken pasta is flawless every time.

  • Overcrowding the Pan: Piling all the chicken into the skillet at once will trap steam and prevent you from getting that beautiful, crispy, flavourful crust.
    • Solution: Always cook the chicken in a single layer. If your pan isn’t big enough, it’s always better to cook it in two separate batches.
  • A Grainy Sauce: This is usually caused by using pre-shredded Parmesan cheese, which contains anti-caking agents that prevent smooth melting.
    • Solution: For the smoothest, most velvety sauce, always buy a block of Parmesan cheese and grate it yourself. It makes a huge difference! Also, be sure to add the cheese over very low heat.
  • Burning the Garlic: Burnt garlic has a harsh, bitter flavour that can ruin your entire sauce.
    • Solution: Sauté the garlic for only 30-60 seconds over medium heat. As soon as you can smell it, it’s ready for the liquid.

Storing and Reheating Tips

Leftovers of this dish are a fantastic treat for lunch the next day!

  • Storing: Store any leftovers in an airtight container in the refrigerator for up to 3 days.
  • Reheating: The cream sauce will thicken considerably as it cools. The best way to reheat this dish is gently in a skillet over low heat. Add a splash of milk or chicken broth and stir frequently until the sauce has loosened and the pasta is warmed through.

Conclusion

This Creamy Garlic Parmesan Chicken Pasta is the perfect proof that you don’t need to spend hours in the kitchen to create a truly spectacular and indulgent meal. It’s a dish that masterfully combines the comforting appeal of cheesy pasta with the savory satisfaction of perfectly seared chicken. This is a recipe that is guaranteed to impress your family and become a new favorite in your 30-minute meal rotation.

We are so excited for you to try this incredibly delicious and easy recipe. Give it a go on your next busy weeknight and let us know what you think in the comments below! Don’t forget to rate the recipe and subscribe for more quick and easy dinner inspiration.

FAQs

Q1. Can I use chicken thighs instead of breasts?

Absolutely! Boneless, skinless chicken thighs would be incredibly juicy and flavourful in this recipe. They may need a few extra minutes of cooking time per side to ensure they are cooked through.

Q2. Can I make this dish with shrimp instead of chicken?

Yes, this recipe is fantastic with shrimp! Season the raw, peeled and deveined shrimp with the same spices. Sear them for just 1-2 minutes per side until they are pink and opaque. Remove them from the pan and proceed with the sauce, adding them back at the very end with the pasta.

Q3. What is the best way to grate Parmesan cheese?

The easiest way to grate a block of Parmesan is with a microplane for a fine, fluffy texture that melts beautifully. A standard box grater’s small holes also work very well.

Primary Sidebar

Welcome! 👋

Your go-to place for quick, healthy, and delicious meal prep ideas.
Discover easy recipes, save time in the kitchen, and enjoy home-cooked meals every day.
Let’s make cooking fun and stress-free!

Feature Your Favorites

Creamy Garlic Parmesan Chicken Pasta (30-Minute Recipe!)

Easy Homemade Crackers Recipe (Crispy & Rustic!)

Easy Buttery Seasoned Rice (Perfect Every Time!)

Best Homemade Baked Beans Recipe (From Scratch!)

The Best Peaches and Cream Protein Smoothie (30g+ Protein!)

The Best Strawberry Acai Refresher Recipe (Starbucks Copycat!)

High-Protein Strawberry Muffins

Copyright © 2025 · Meal Prep Recipes